From Shared Hosting to VPS: A Step-by-Step Laravel Migration + CI/CD Guide
From Shared Hosting to VPS: A Step-by-Step Laravel Migration + CI/CD Guide
A practical, detailed guide showing how to migrate a Laravel application from Hostinger shared hosting to a VPS using CloudPanel. Includes server setup, Node/Vite builds, permissions, Nginx tips, GitHub Actions CI/CD, SSH key setup, zero-downtime deploy patterns, and backup recommendations — with copy-paste configs and commands.
How to Move Your Laravel Project From Shared Hosting to a VPS
Shared hosting is simple:
- Upload files
- No SSH
- No control
- And you often cannot run Node, Composer, or CI/CD pipelines.
This was exactly my situation.
When my shared hosting plan ended, I switched to a VPS — and the difference was unbelievable.
In this guide, I will show you exactly how to move your Laravel website from shared hosting to a VPS, step by step, without confusion.
This is written for beginners, and everything is explained clearly.
Let’s start.
🟦 Step 1: Understand Why Moving to a VPS is Actually Easier
Many developers think VPS = harder.
In reality:
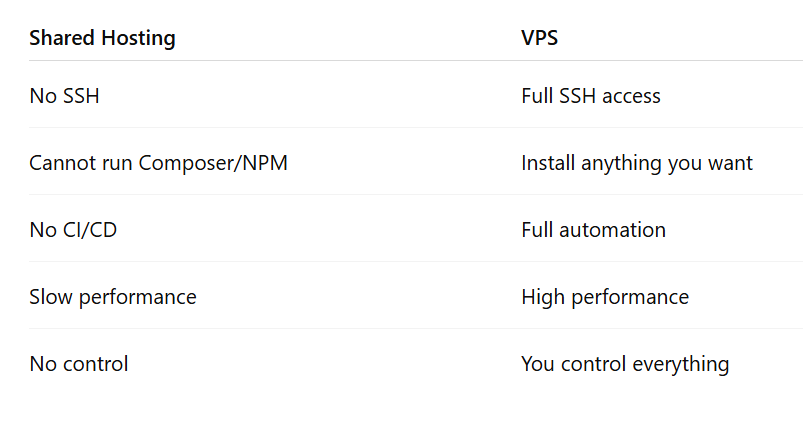
Once you switch to a VPS, your deployment becomes much easier.
🟦 Step 2: Point Your Domain to the VPS (DNS Setup)
This is the first and most important step, otherwise your domain will still point to your old shared hosting.
If your domain is on Hostinger, Namecheap, GoDaddy, or any registrar:
You will receive from the VPS:
- An IPv4 address
- (Sometimes) an IPv6 address
You must update your DNS records:
Go to your domain → DNS → Add:
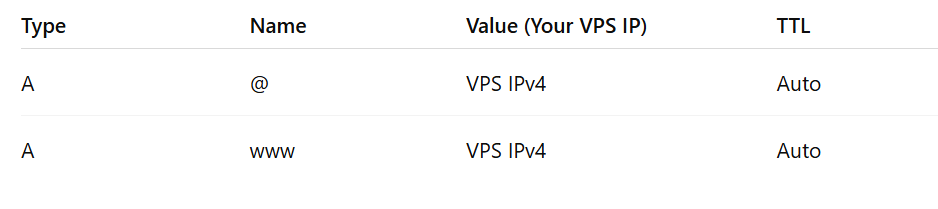
If you have IPv6:
| AAAA | @ | IPv6 | Auto |
📝 Important: DNS propagation may take 1 minute or up to 2 hours.
When your DNS is correct, visiting your domain should show:
“CloudPanel – No site configured”
This means the domain is now pointing to your VPS. ✔️
🟦 Step 3: Install CloudPanel on Your VPS
CloudPanel is one of the easiest panels for developers.
Why CloudPanel?
- Automatic Nginx setup
- Automatic PHP versions
- Automatic SSL
- Built-in phpMyAdmin
- Easy database creation
- Easy FTP/SFTP
- Laravel preset when creating a new site
- Extremely fast and lightweight
Installing CloudPanel (1 command)
SSH into your VPS:
ssh root@YOUR_VPS_IP
Then run:
curl -sSL https://installer.cloudpanel.io/ce/v2/install.sh | sudo bash
After it finishes, open:
https://YOUR_SERVER_IP:8443
Create your admin user.
You’re now inside CloudPanel. ✔️
🟦 Step 4: Create Your Laravel Site (CloudPanel Makes This Super Easy)
Inside CloudPanel dashboard:
- Click "Sites"
- Click "Create Site"
- Choose:
- PHP Site
- Framework: Laravel
- Version: Laravel 10 / 11 / etc
- Enter your domain
- Click Create
CloudPanel will automatically:
✔ Install the correct PHP version
✔ Install Composer
✔ Create the folder structure
✔ Prepare Nginx config for Laravel
✔ Create a dedicated system user for your site
This saves hours of manual configuration.
🟦 Step 5: Install Free SSL Certificate (1 Button)
Inside your site → SSL:
Click:
Issue Certificate
CloudPanel uses Let’s Encrypt, so it is 100% free.
DNS must be correct (Step 2), otherwise SSL will fail.
After enabling SSL, your site is now HTTPS-secured.
🟦 Step 6: Upload Your Laravel Code
Go to:
- Sites
- Select your site
- See the System User (example:
clp12345) - Use SFTP or SSH
Example:
ssh clp12345@YOUR_VPS_IP
Navigate to:
/home/clp12345/htdocs
This is where your Laravel project should be.
Upload your project files here.
🟦 Step 7: Install Dependencies on the Server
CloudPanel makes this easy because Composer + PHP are already installed.
Run:
composer install --optimize-autoloader --no-dev
Then install Node/NPM:
curl -fsSL https://deb.nodesource.com/setup_20.x | sudo -E bash -
sudo apt install -y nodejs
Then build your frontend:
npm install
npm run build
Now your Laravel app is fully built on the server without any pain.
🟦 Step 8: Migrate Your Database (Easiest Part)
CloudPanel includes phpMyAdmin already.
Go to:
- CloudPanel
- Databases
- Click Create Database
- Assign a user + password
To migrate your old database:
- Export your database from shared hosting (phpMyAdmin → Export)
- Open CloudPanel → phpMyAdmin → Import
- Upload the file
Done.
Now update your .env file with the new database credentials.
🟦 Step 9: Fix Storage & Permissions
Inside your project:
php artisan storage:link
Set correct permissions:
chmod -R 775 storage bootstrap/cache
And ensure ownership matches your CloudPanel system user:
Example:
chown -R clp12345:clp12345 /home/clp12345/htdocs
This fixes 90% of “403 Forbidden” and “storage not found” problems.
🟦 Step 10: Verify Your Domain is Working
Now visit:
https://your-domain.com
If everything is correct, your Laravel app should load.
If you see 403 or 500 errors, don’t worry — that’s normal when migrating.
Check:
.envdatabase values- File permissions
- Environment variables
- Missing storage symlink
🟦 Step 11: Optional but Recommended — Add SSH Deployment + CI/CD
Once you’re on a VPS, you can finally use GitHub Actions.
Create an SSH key on the server:
ssh-keygen -t ed25519 -C "deploy"
Add the public key to GitHub → Deploy Keys.
Add the private key as GitHub secret.
Then use this GitHub Action:
- SSH → pull latest code
- Composer install
- Build assets
- Clear + cache Laravel
- Run migrations
- Restart PHP-FPM
Now your deployment becomes:
Push → automatic deployment → live
No more FileZilla.
No more uploading files manually.
No more headaches.
🟢 Optional Tips You Should Know (Very Useful)
✔ CloudPanel creates a “system user” — use it always
Never deploy as root.
✔ CloudPanel has separate php.ini for each site
You can edit it easily.
✔ You can switch PHP versions anytime
Better than shared hosting.
✔ You can enable Redis, Supervisor, CRON jobs
All from the panel.
✔ Backups can be automated
CloudPanel supports AWS S3, DigitalOcean Spaces, etc.
🟦 Final Thoughts
Moving from shared hosting to a VPS feels scary — but once you do it, you realize it's actually much easier, more powerful, and more reliable.
CloudPanel makes everything simple:
- Creating a Laravel site
- Installing SSL
- Managing PHP versions
- Handling databases
- Managing files
- And even giving you phpMyAdmin built-in
And once you add GitHub Actions, your deployment becomes professional and automated.
If you want to start using DevOps concepts, a VPS is the best first step.
Comments
(0)
Leave a Comment
No comments yet
Be the first to share your thoughts!